Wyze Cam Instructions: A Comprehensive Guide to Setting Up and Using Your Wyze Cam
In recent years, home security has become a top priority for many homeowners. With advancements in technology, it is now easier than ever to keep an eye on your property and loved ones, even when you are away. One such device that has gained popularity is the Wyze Cam. This affordable and feature-packed security camera offers high-quality video monitoring and a range of useful features. In this article, we will provide you with a comprehensive guide on how to set up and use your Wyze Cam effectively.
Section 1: Unboxing and Initial Setup
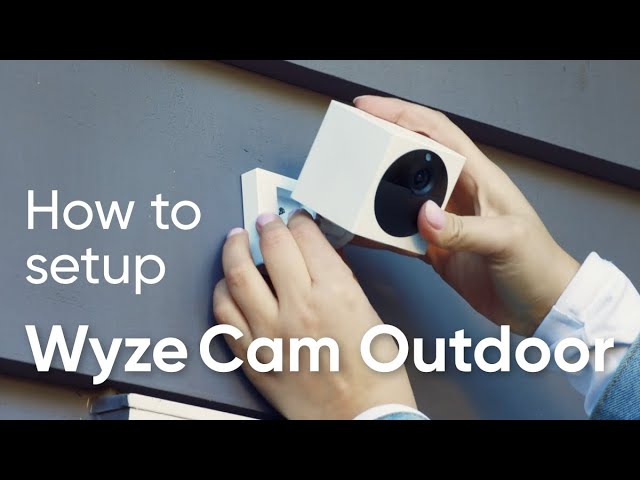
The first step in using your Wyze Cam is unboxing and setting it up. When you open the box, you will find the Wyze Cam itself, a USB cable, a power adapter, and a quick start guide. Begin by connecting the USB cable to the Wyze Cam and the power adapter. Plug the power adapter into a wall outlet, and you will see a yellow light on the camera indicating that it is powered on.
Next, download the Wyze app on your smartphone from the App Store or Google Play Store. Once installed, open the app and create an account if you don’t already have one. Follow the on-screen instructions to add a new device. The app will guide you through the process of connecting your Wyze Cam to your Wi-Fi network. Make sure you have your Wi-Fi network name and password handy.
Section 2: Camera Placement and Positioning
Now that your Wyze Cam is connected to your Wi-Fi network, it’s time to find the perfect spot to place it. The Wyze Cam comes with a magnetic base, allowing you to easily attach it to any metal surface. Alternatively, you can use the included adhesive metal plate to mount it on a wall or ceiling. Consider the areas you want to monitor and ensure that the camera has a clear view of those spaces.
It is recommended to position the Wyze Cam at eye level, as this provides the best viewing angle. Avoid placing it too high or too low, as it may affect the camera’s field of view. Additionally, make sure the camera is not facing a bright light source, as this can cause glare and affect the image quality. Experiment with different positions to find the optimal placement for your specific needs.
Section 3: Wyze Cam Features and Settings
The Wyze Cam offers a range of features and settings that allow you to customize your monitoring experience. In the Wyze app, you can access these features by selecting your camera from the device list. Let’s explore some of the key features:
1. Live View: This feature allows you to view real-time video footage from your Wyze Cam. Simply open the app and select your camera to access the live feed. You can also enable sound and two-way audio, allowing you to communicate with people near the camera.
2. Motion Detection: The Wyze Cam has built-in motion detection capabilities. You can enable this feature in the app and adjust the sensitivity level to suit your needs. When motion is detected, the camera will send a notification to your smartphone, allowing you to quickly check the live feed and take appropriate action if necessary.
3. Event Recording: With a microSD card inserted into your Wyze Cam, you can enable event recording. This feature automatically records video clips when motion or sound is detected. You can review these clips later in the app’s Events tab.
4. Time-lapse Recording: Another interesting feature of the Wyze Cam is time-lapse recording. This allows you to capture long periods of time in a condensed video format. You can set the interval between frames and the duration of the recording to create captivating time-lapse videos.
Section 4: Additional Tips and Troubleshooting
While the Wyze Cam is designed to be user-friendly, you may encounter some issues or have questions along the way. Here are a few additional tips and troubleshooting steps to help you make the most of your Wyze Cam:
1. Ensure a stable Wi-Fi connection: To avoid connectivity issues, make sure your Wyze Cam is within range of your Wi-Fi router. If you experience frequent disconnections, try moving the camera closer to the router or consider using a Wi-Fi extender.
2. Adjust motion detection settings: If you are receiving too many false notifications, you can fine-tune the motion detection settings in the Wyze app. Decreasing the sensitivity level or adjusting the detection zone can help reduce false alarms.
3. Enable night vision: The Wyze Cam is equipped with infrared LEDs for night vision. If you want to monitor your property in low-light conditions, make sure to enable night vision in the app settings.
4. Keep the firmware updated: Wyze regularly releases firmware updates to improve performance and add new features. Check for updates regularly in the Wyze app and install them to ensure your camera is up to date.
Conclusion:
Setting up and using your Wyze Cam is a straightforward process that can greatly enhance your home security. By following the instructions provided in this guide, you can easily get your Wyze Cam up and running in no time. Remember to experiment with camera placement, explore the various features and settings, and troubleshoot any issues that may arise. With the Wyze Cam by your side, you can have peace of mind knowing that your home is under constant surveillance.